

How To Fix Toilets That Keep Running
How to Gear up a Running Toilet
Check inside the toilet tank for a leaky flapper, bad fill valve, or overflow piping at the wrong height.
![]() Fourth dimension
Fourth dimension
An hour or less
![]() Complexity
Complexity
Beginner
![]() Cost
Cost
Less than $20
Introduction
Fixing a running toilet is a lot easier than you might think. In this article, we'll show you lot how to place and solve the problem. Don't be intimidated by the plumbing. The fixes are straightforward, fifty-fifty if you don't take any plumbing feel. So stop wasting water and prepare the toilet!
Tools Required
Materials Required
- May need new fill valve
Project step-past-step (5)
Footstep 1
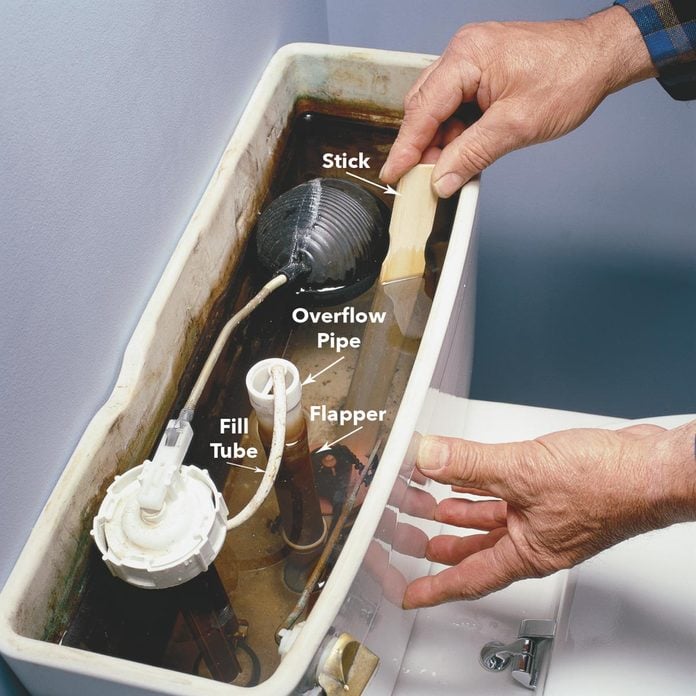
Test the Flapper
- Push downward on the flapper with a stick when you hear the water running and mind for it to terminate.
- If information technology stops, yous know the flapper isn't sealing properly. Replace it.
- Check the make full tube length and cut it back then it's at to the lowest degree 1/ii-in. higher up the water line.
- To replace the flapper, kickoff shut off the water supply valve nether the toilet (or the main supply if the valve leaks!).
- Flush the toilet to drain out most of the water, then unhook the old flapper.
- Buy a new flapper of the same type and install it according to the instructions on the package.
- Hook the flapper chain onto the flush lever arm and so in that location's a niggling slack when the flapper is closed.
Step 2
Check the Fill Valve for a Leak
- Flush the toilet and look for a fill valve leak.
- Lift up on the toilet float arm when the tank is filling to come across if the h2o stops.
- Bend or adjust the toilet float arm so the tank stops filling when the h2o level is 1/2- to one-inch below the top of the overflow pipe.
- If the fill valve still leaks, replace it every bit shown in the next photo.

![]()
Step iii
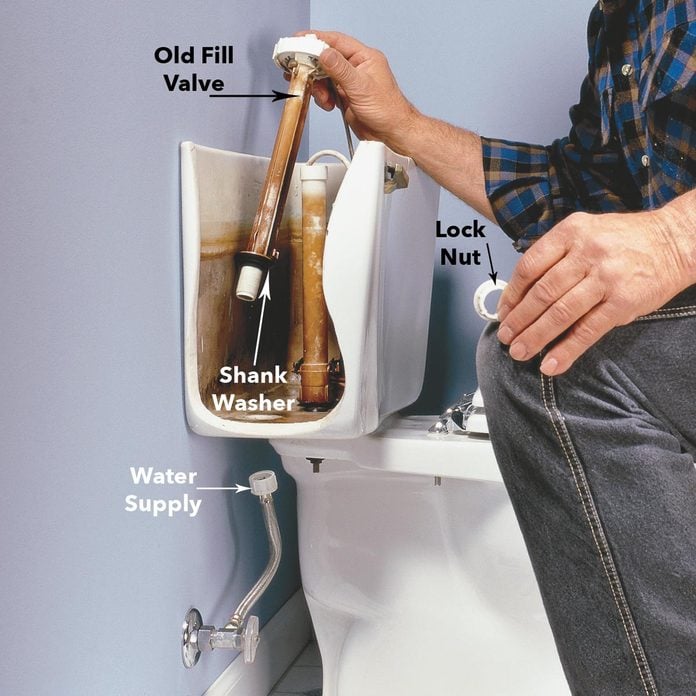
Remove and Replace One-time Toilet Fill Valve
- Plow off the h2o supply, flush the toilet and sponge the remaining water from the tank.
- Disconnect the water supply line, unscrew the make full valve locknut and lift out the old make full valve.
Stride four
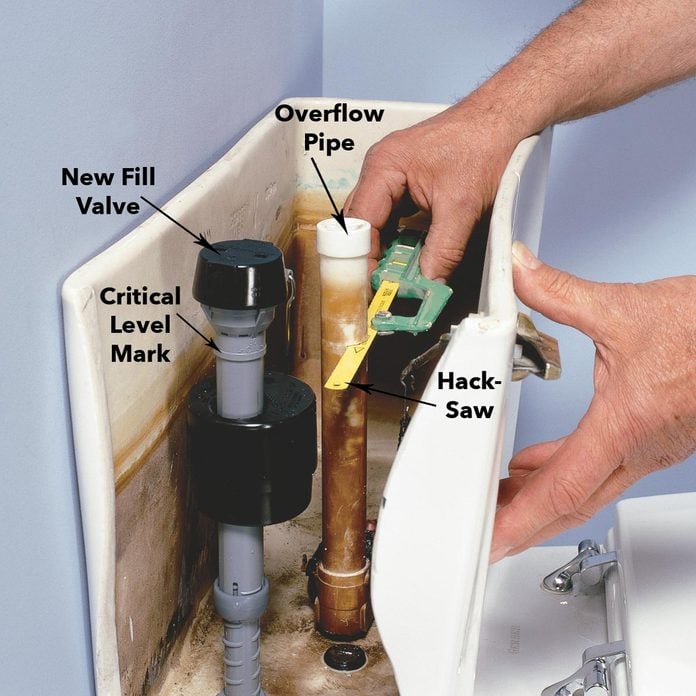
Install the New Make full Valve
- Insert the new fill valve into the tank according to the instruction sail and tighten the locknut a one-half turn past paw tight.
- If the fill valve is at its maximum top, only the overflow pipe is still higher than the disquisitional level mark, shorten the overflow pipe with a hacksaw so information technology's one inch lower than the critical level mark on the fill valve.
Pace five
Connect the Fill Tube
- Attach one cease of the new fill tube to the fill valve nipple and the other to the enclosed bending adapter (shorten the tube to avoid kinks, if necessary).
- Clip the angle adapter onto the overflow pipe.
- Terminate the installation by attaching the flapper chain to the affluent lever as described above.
- Turn on the h2o and test-flush the toilet.

Originally Published: November 25, 2022

Source: https://www.familyhandyman.com/project/how-to-fix-a-running-toilet/
Posted by: ginnwastionews.blogspot.com
0 Response to "How To Fix Toilets That Keep Running"
Post a Comment